Rolo
-
Posts
79 -
Credits
0 -
Joined
-
Last visited
-
Days Won
6 -
Feedback
0%
Content Type
Articles
Profiles
Forums
Store
Everything posted by Rolo
-

Share Another version of Giran's centre. (Interlude)
Rolo replied to Rolo's topic in Client Development Discussion
Still think it's the geodata, I've changed mine and there's no problem with flying NPS. ) It's not the same version, the standard Giran textures are used here and in your screenshot they've been changed. Also in this version my co-author wanted to place a tent in the square. Also, in my version there are trees on the square and in yours there are none. -
Share Another version of Giran's centre. (Interlude)
Rolo replied to Rolo's topic in Client Development Discussion
Yes, these areas are restricted by the geodata, here they are: -
Share Another version of Giran's centre. (Interlude)
Rolo replied to Rolo's topic in Client Development Discussion
You're welcome! ) I've also updated the first post, added a link and a picture of the centre without the lions, maybe someone else will find it useful. -
Share Another version of Giran's centre. (Interlude)
Rolo replied to Rolo's topic in Client Development Discussion
It's possible, no more lions! ) Update the file: https://drive.google.com/file/d/1n-8FQG_K4ddn3Lm7qbiPAyPDPKR8b0mS/view?usp=sharing -
Share Another version of Giran's centre. (Interlude)
Rolo replied to Rolo's topic in Client Development Discussion
Lions are MURC's 's work not mine! )) You mean remove them altogether? If so, that can be arranged. ) -
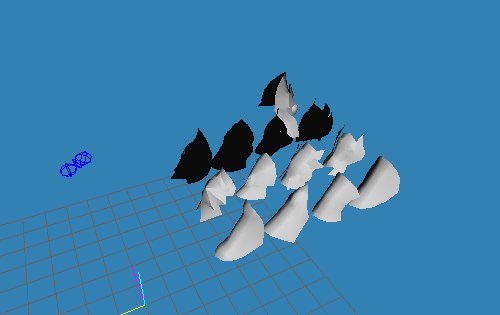
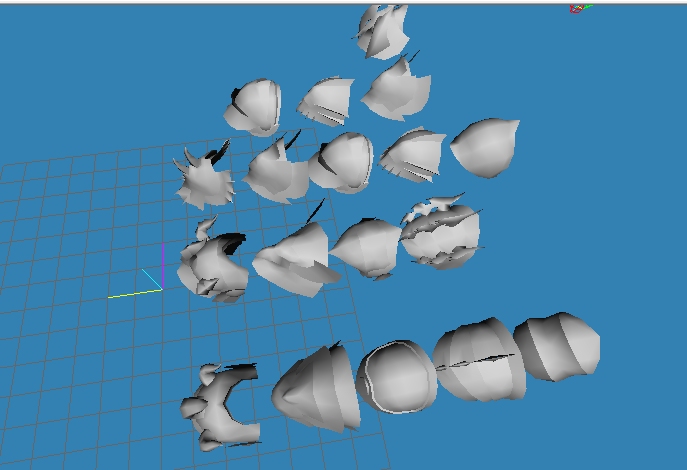
I felt comfortable choosing when they are lined up together, you might like them too. ) The logic of the arrangement there is as follows: 00 01 02 03 04 10 11 12 13 14 20 21 22 23 24 30 31 32 33 34 х 41 42 If the shoulder does not exist - it is missing, but the order is respected. https://drive.google.com/file/d/1-QZPosXj3Et1NYAFRo3C_rrSRs0oKFkL/view?usp=sharing

-
Share Another version of Giran's centre. (Interlude)
Rolo posted a topic in Client Development Discussion
Authors: MURC, Rolo https://drive.google.com/file/d/1DR2Gql8UuipISVGr0V1HDWgfljlMV1R5/view?usp=sharing -
Share New hairstyles from the GOD Chronicle (Interlude)
Rolo replied to Rolo's topic in Client Development Discussion
No, Interlude. -
Author: Rolo Enjoy. ) Download: https://drive.google.com/file/d/1J3EQY49v3cyyJbekfPeLKQG7RCrGHgCm/view?usp=sharing
-
Download: https://cloud.mail.ru/public/74pV/TtFbMiiuu
-
Hey guys! I am publishing this manual by your many requests. But all code will be available to VIP Members only. In the end, it will look like this: First of all, in the interface we open the class [Hidden Content], and find the [Hidden Content] function there. At the very top, add a new variable: local EItemType eItemType; Then, after all the local variables, we need to set our new variable: eItemType = EItemType(info.ItemType); Now we will have two options to choose from. In the first one, you will not see the enchantment level displayed if it is zero. In the second one, all items that can be enchanted will show an enchantment level of +0-35. Go down to the bottom of the function and add one of the code options. First option (+0 is not displayed ) : [Hidden Content] Second option (+0 displayed ) : [Hidden Content] Note the "Info.Enchanted <= 35" part of the code; the number "35" is the last enchantment level to be displayed. If you add your icons where the enchantment level will be greater than 35, change that number in your code! If you have enough +0-35 icons, you can download them here: https://maxcheaters.com/topic/239445-pack-of-icons-for-enchanting-levels-0-35/
-
Guide Animated icon / logo / texture for HTML / Interface
Rolo replied to Rolo's topic in Client Development Discussion
Thank you for pointing out the error, updated! -
Share Pack of animated textures for html / interface
Rolo replied to Rolo's topic in Client Development Discussion
You are welcome! Hope it comes in handy for someone. ) -
Share Pack of animated textures for html / interface
Rolo posted a topic in Client Development Discussion
2 "pulsating" frames, 1 button, 1 icon. Texture names: PledgeSelect_ani01 -32х32; BloodyCoin_ButtonBlink_01 - 256х32; AttendTodayEffect_00 - 64х128; OlympiadWnd_BlinkAni_01 - 128х128 download: https://drive.google.com/file/d/1VM2coIoNf7_4WvfyueCwCnEnexh9kYGI/view?usp=sharing password: [Hidden Content] -
download: https://drive.google.com/file/d/15msPZfz5uq8W3NhsEHWPMTdB-glZHA5_/view?usp=sharing password: [Hidden Content] HtmlWnd_BTN01 HtmlWnd_BTN01.down HtmlWnd_BTN01.over HtmlWnd_BTN01High HtmlWnd_BTN01High.down HtmlWnd_BTN01High.over HtmlWnd_BTN02 HtmlWnd_BTN02.down HtmlWnd_BTN02.over HtmlWnd_BTN02High HtmlWnd_BTN02High.down HtmlWnd_BTN02High.over
-
Guide Self-target function on hot key "Space" (Interface)
Rolo replied to Rolo's topic in Client Development Discussion
You are welcome. -
Guide Self-target function on hot key "Space" (Interface)
Rolo replied to Rolo's topic in Client Development Discussion
It's * u, the functions themselves are there, * xdat is just markup, this file does not contain functions. -
Guide Self-target function on hot key "Space" (Interface)
Rolo replied to Rolo's topic in Client Development Discussion
No, you don't need to enter character nicknames in the code. You need the index of the group member, in default it looks like this: rectWnd = m_wndTop.GetRect(); if (X > rectWnd.nX + 13 && X < rectWnd.nX + rectWnd.nWidth -10) { if (GetPlayerInfo(userinfo)) { idx = (Y-rectWnd.nY) / NPARTYSTATUS_HEIGHT; RequestAssist(m_arrID[idx], userinfo.Loc); } } As you can see, the position of the mouse and the index of the window by which the assist is taken are calculated. Accordingly, you can always set an assist by the party leader (as an example), or by a group member with an index of 1-8 (also, for example, you can add a form for entering the index of a group member for which the assist will be made). -
Guide Self-target function on hot key "Space" (Interface)
Rolo replied to Rolo's topic in Client Development Discussion
Yes, of course. -
Guide Animated icon / logo / texture for HTML / Interface
Rolo replied to Rolo's topic in Client Development Discussion
Thanks for your kind words in all your comments! -
If the question is still relevant to you, I have an answer. Sorry in advance for broken English, I use google translator. You need to introduce a local variable: local int CrystalChap; In the ITEM_WEAPON block, we define it: CrystalChap = Item.CrystalType; if (Item.CrystalType > 5) { CrystalChap = 5; } In tooltips for physical and magical attacks, replace Item.CrystalType with CrystalChap, you get something like this: //Physical Damage AddTooltipItemOption(94, String(GetPhysicalDamage(Item.WeaponType, Item.SlotBitType, CrystalChap, Item.Enchanted, Item.PhysicalDamage)), true, true, false); //Masical Damage AddTooltipItemOption(98, String(GetMagicalDamage(Item.WeaponType, Item.SlotBitType, CrystalChap, Item.Enchanted, Item.MagicalDamage)), true, true, false); There will be no more problems with displaying enchants level.
-
Guide LS display in armor and accessories in Interface, Interlude
Rolo replied to Rolo's topic in Client Development Discussion
Thanks for all your comments, I hope they will be useful to someone. ) -
The information is more relevant for Interlude, but will work for the chronicles above as well. According to this example, you can bind any function (from calling the window for inserting a LAN, to your unique bypass, or some function like "target loss protection") to any hotkey or key combination. First of all, go to xdat, Interface \ Shortcuts \ GamingStateShortcut and select a key / key combination, for example like this: <ShortcutItem Key="IK_Space" SubKey1="IK_Alt">SelfTarget</ShortcutItem> Now for target self you need to hold down the viola and click the space bar. The key codes are sometimes obvious (IK_F1, IK_B, IK_Enter), and sometimes not very, just in case: Next, you need to describe the "SelfTarget" command itself. The easiest option is to go into the Interface \ Classes \ Shortcut scripts and find function HandleShortcutCommand (String a_Param) there and add: case "SelfTarget": RequestSelfTarget(); break; But, of course, you can insert a command into any class, but then you will have to create in it: function OnEvent( int a_EventID, String a_Param ) { switch( a_EventID ) { case EV_ShortcutCommand: HandleShortcutCommand( a_Param ); break; } } as well as the Handler itself : function HandleShortcutCommand( String a_Param ) { local String Command; if( ParseString( a_Param, "Command", Command ) ) { switch( Command ) { case "SelfTarget": RequestSelfTarget(); break; } } } That's all, with the help of these examples, you can call any function, in any class, to any key combination you need. Please note that if you call two different functions with one key, from different classes, but with the same name, they will be called simultaneously. It is convenient to use, for example, to simultaneously enable auto-buff and skill-spam panels from different classes.
-
To teach the Interlude client to see LANs where they shouldn't be, you need to make a few changes in the Interface.U scripts. Using the example of Jewelry and Hats: first, look in Interface \ Classes \ ToolTip: // 3. ACCESSARY case ITEM_ACCESSARY: bLargeWidth = true; //Slot Type if (Len(SlotString)>0) AddTooltipItemOption(0, SlotString, false, true, false); //Masical Defense AddTooltipItemOption(99, String(GetMagicalDefense(Item.CrystalType, Item.Enchanted, Item.MagicalDefense)), true, true, false); //Weight AddTooltipItemOption(52, String(Item.Weight), true, true, false); break; Here we need to draw a LAN output, similar to ITEM_WEAPON, we get something like this: // 3. ACCESSARY case ITEM_ACCESSARY: bLargeWidth = true; if (Item.RefineryOp1 != 0 || Item.RefineryOp2 != 0) { AddTooltipItemBlank(12); AddTooltipItemOption(1490, "", true, false, false); SetTooltipItemColor(255, 255, 255, 0); if (Item.RefineryOp2 != 0) { Quality = class'UIDATA_REFINERYOPTION'.static.GetQuality( Item.RefineryOp2 ); GetRefineryColor(Quality, ColorR, ColorG, ColorB); } if (Item.RefineryOp1 != 0) { strDesc1 = ""; strDesc2 = ""; strDesc3 = ""; if (class'UIDATA_REFINERYOPTION'.static.GetOptionDescription( Item.RefineryOp1, strDesc1, strDesc2, strDesc3 )) { if (Len(strDesc1)>0) { AddTooltipItemOption(0, strDesc1, false, true, false); SetTooltipItemColor(ColorR, ColorG, ColorB, 0); } if (Len(strDesc2)>0) AddTooltipItemOption(0, strDesc2, false, true, false); if (Len(strDesc3)>0) { AddTooltipItemOption(0, strDesc3, false, true, false); SetTooltipItemColor(ColorR, ColorG, ColorB, 0); } } } if (Item.RefineryOp2 != 0) { strDesc1 = ""; strDesc2 = ""; strDesc3 = ""; if (class'UIDATA_REFINERYOPTION'.static.GetOptionDescription( Item.RefineryOp2, strDesc1, strDesc2, strDesc3 )) { if (Len(strDesc1)>0) AddTooltipItemOption(0, strDesc1, false, true, false); if (Len(strDesc2)>0) AddTooltipItemOption(0, strDesc2, false, true, false); SetTooltipItemColor(ColorR, ColorG, ColorB, 0); } if (Len(strDesc3)>0) { AddTooltipItemOption(0, strDesc3, false, true, false); } } AddTooltipItemOption(1491, "", true, false, false); SetTooltipItemColor(ColorR, ColorG, ColorB, 0); if (Len(Item.Description)>0) { AddTooltipItemBlank(12); } if (Len(SlotString)>0) AddTooltipItemOption(0, SlotString, false, true, false); AddTooltipItemOption(99, String(GetMagicalDefense(Item.CrystalType, Item.Enchanted, Item.MagicalDefense)), true, true, false); AddTooltipItemOption(52, String(Item.Weight), true, true, false); break; After these changes, the client will begin to see IDs in jewelry and accessories, the same can be done for ITEM_ARMOR, so that IDs are displayed in armor. From the server side, first of all, you need to allow augmentation of not only weapons. Using the example of my assembly, this is done here: src \ net \ sf \ l2j \ gameserver \ model \ L2ItemInstance We are looking for public boolean canBeAugmented () and replace it with the condition we need, using the example of the possibility of inserting drugs into jewelry and accessories, for example, like this: if (getItem().getItemGrade() < L2Item.CRYSTAL_C || (getItem().getType2() != L2Item.TYPE2_WEAPON && getItem().getType2() != L2Item.TYPE2_ACCESSORY)) { return false; } Likewise with armor, you can enable / disable insertion into certain parts of the armor, for example, only into the breastplate. Of course, then you will need to configure which LANs and where they are inserted, under what conditions for inserting and removing LANs, etc., but this is a completely different story, the goal was to indicate where this is done in the client, because on the server side everything depends on the assembly.
-
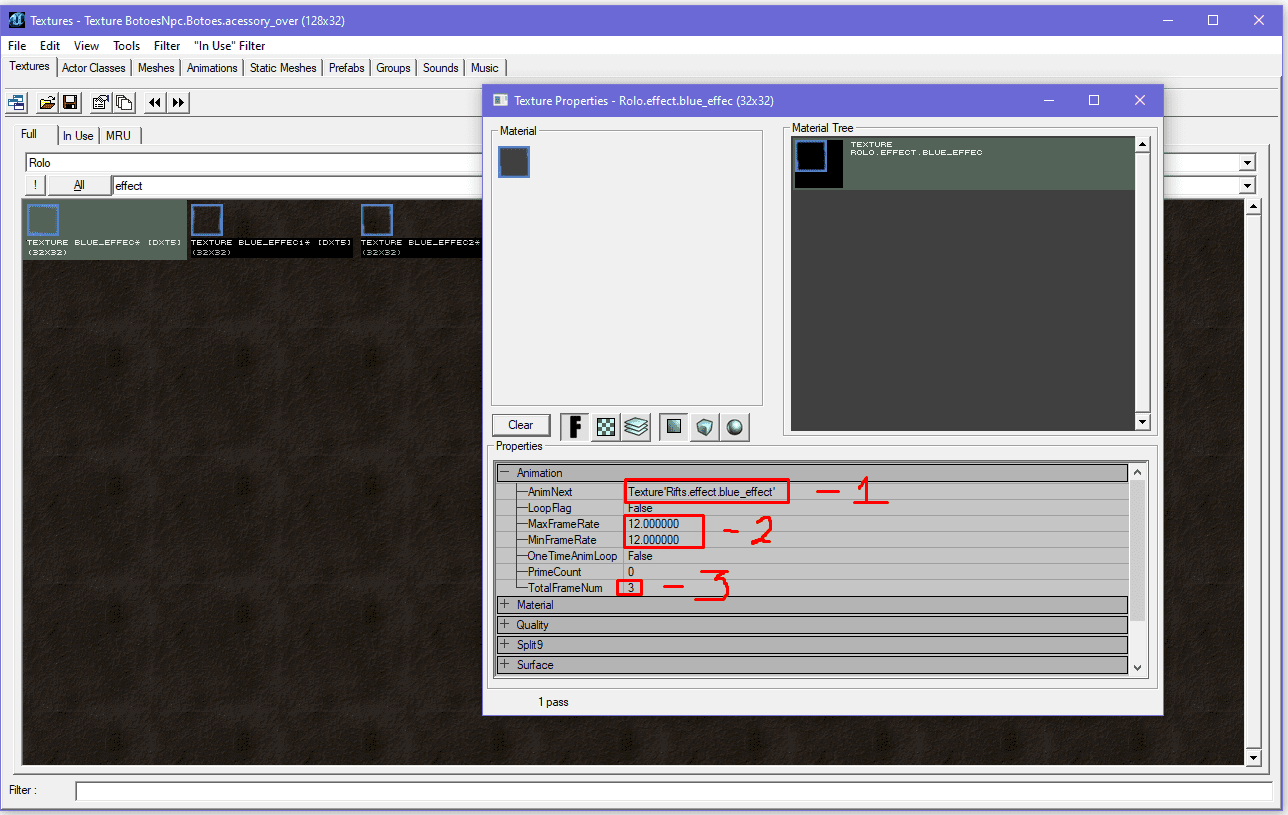
First of all, we need to get the "frames" of our animation, because by itself it is a series of quickly (or not so) scrolling textures. When the textures are ready, load them into UE2 (it is assumed that you can do this, since you set out to make your own animated logo). Important notes: Name textures with numbering, this will greatly simplify your life when assembling textures into animation. Note that the UE will supply a file called texture_11 rather than texture_2. In other words, it sorts by matching characters, and does not read your numbering. The 1 comes before the 2, so even if there are at least 100 million, the texture will be in front of the 2 texture. Open our first texture with the right button, click Properties, open the Animation block in the pop-up window, and look: 1 is the next texture in our animation. 2 - number of frames per second (animation scrolling speed). 3 - the total number of textures in the animation. Important notes: Strictly follow the order of adding animations. Your goal is in the line AnimNext (now it will be unexpected) to specify the next texture in the animation. Thus, the Properties of the first AnimNext texture contains the second texture; The Properties of the second AnimNext texture contains the third texture; The Properties of the third AnimNext texture contains the first texture; There is no need to specify the number and speed of texture playback in each texture, this is done only in the first texture! All subsequent ones should contain only a link to the next texture. There is a small nuance of adding the next texture, copying the name of the next texture into the line is an obvious, but not correct move. This is done as follows: Select the texture, open its Properties, now move the pop-up window, click on the next texture, and in the Properties of the first texture, in the AnimNext line, click use. This is how we add all the textures to the animation chain. When we loop the last texture on the first one, and go to the Properties of the first texture, we will see the animation itself, if it is not there, something jerks / disappears - most likely, you missed some texture, or poorly composed a number of textures, or not followed order, or you have invented a new way to screw everything up with which I congratulate you and sympathize with you at the same time. And that's all, then save it as a regular texture, the name of the very first texture is inserted into HTML, where the number and frequency of frame refresh are set.