


Rolo
-
Posts
79 -
Credits
0 -
Joined
-
Last visited
-
Days Won
6 -
Feedback
0%
Content Type
Articles
Profiles
Forums
Store
Posts posted by Rolo
-
-
23 minutes ago, KabLe21 said:
yeah
 nice
nice  only when port on this place cant move, any geodata problem or lions invisible and stuck on him
Yes, these areas are restricted by the geodata, here they are:

-
Just now, Celestine said:
Super thank you !
You're welcome! )
I've also updated the first post, added a link and a picture of the centre without the lions, maybe someone else will find it useful. -
1 minute ago, Celestine said:
[RU] он хочет удалить лев и нечево болше
[EN] Great Share i like it
It's possible, no more lions! ) Update the file:
https://drive.google.com/file/d/1n-8FQG_K4ddn3Lm7qbiPAyPDPKR8b0mS/view?usp=sharing-
 1
1
-
 2
2
-
-
4 hours ago, KabLe21 said:
nice share man
thx
// @Rolo only this tigers on stairs not like
 can be edit it ?
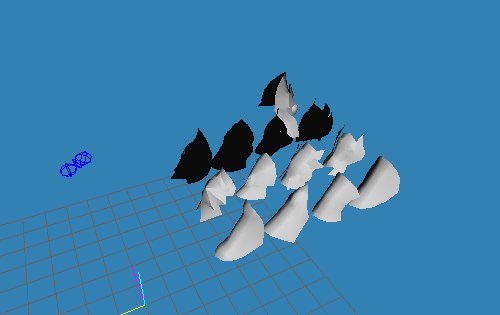
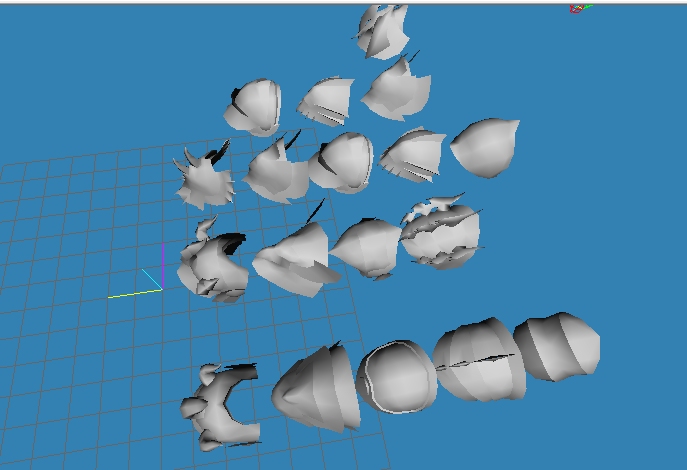
Lions are MURC's 's work not mine! ))
You mean remove them altogether? If so, that can be arranged. ) -
I felt comfortable choosing when they are lined up together, you might like them too. )
The logic of the arrangement there is as follows:
00 01 02 03 04
10 11 12 13 14
20 21 22 23 24
30 31 32 33 34
х 41 42
If the shoulder does not exist - it is missing, but the order is respected.https://drive.google.com/file/d/1-QZPosXj3Et1NYAFRo3C_rrSRs0oKFkL/view?usp=sharing
-
Authors: MURC, Rolo
https://drive.google.com/file/d/1DR2Gql8UuipISVGr0V1HDWgfljlMV1R5/view?usp=sharing
SpoilerSame centre but without the lions:
First add all the files from the main archive, and then replace one file in the maps folder with this one:https://drive.google.com/file/d/1n-8FQG_K4ddn3Lm7qbiPAyPDPKR8b0mS/view?usp=sharing
-
2
-
 1
1
-
1
-
-
-
-
-
Hey guys! I am publishing this manual by your many requests. But all code will be available to VIP Members only.
SpoilerIf you have published many useful topics, but do not have vip status, write me a private message.
In the end, it will look like this:
First of all, in the interface we open the class
, and find the function there. At the very top, add a new variable:local EItemType eItemType;
Then, after all the local variables, we need to set our new variable:
eItemType = EItemType(info.ItemType);
Now we will have two options to choose from. In the first one, you will not see the enchantment level displayed if it is zero. In the second one, all items that can be enchanted will show an enchantment level of +0-35. Go down to the bottom of the function and add one of the code options.
First option (+0 is not displayed ) :
Second option (+0 displayed ) :
Note the "Info.Enchanted <= 35" part of the code; the number "35" is the last enchantment level to be displayed. If you add your icons where the enchantment level will be greater than 35, change that number in your code!
If you have enough +0-35 icons, you can download them here:
https://maxcheaters.com/topic/239445-pack-of-icons-for-enchanting-levels-0-35/
-
3
-
2
-
-
2 minutes ago, CriticalError said:
sorry can you update the secon pic of chain? it look like missed, thanks.
Thank you for pointing out the error, updated!
-
1
-
-
59 minutes ago, Vision said:
You are welcome! Hope it comes in handy for someone. )
-
2 "pulsating" frames, 1 button, 1 icon.
Texture names:
PledgeSelect_ani01 -32х32;
BloodyCoin_ButtonBlink_01 - 256х32;
AttendTodayEffect_00 - 64х128;
OlympiadWnd_BlinkAni_01 - 128х128
download: https://drive.google.com/file/d/1VM2coIoNf7_4WvfyueCwCnEnexh9kYGI/view?usp=sharingpassword:
-
1
-
2
-
-
download: https://drive.google.com/file/d/15msPZfz5uq8W3NhsEHWPMTdB-glZHA5_/view?usp=sharing
password:
HtmlWnd_BTN01
HtmlWnd_BTN01.down
HtmlWnd_BTN01.overHtmlWnd_BTN01High
HtmlWnd_BTN01High.down
HtmlWnd_BTN01High.overHtmlWnd_BTN02
HtmlWnd_BTN02.down
HtmlWnd_BTN02.overHtmlWnd_BTN02High
HtmlWnd_BTN02High.down
HtmlWnd_BTN02High.over-
1
-
1
-
-
Just now, lolpwnz89 said:
ah ok very thx man
You are welcome.

-
Just now, lolpwnz89 said:
this code is in interfece.xdat? or .u?
It's * u, the functions themselves are there, * xdat is just markup, this file does not contain functions.
-
27 minutes ago, lolpwnz89 said:
but i must in code write nickname or can use party window 1,2,3,4 etc? how it work on Interlude?
No, you don't need to enter character nicknames in the code. You need the index of the group member, in default it looks like this:
 rectWnd = m_wndTop.GetRect();
    if (X > rectWnd.nX + 13 && X < rectWnd.nX + rectWnd.nWidth -10)
    {
        if (GetPlayerInfo(userinfo))
        {
            idx = (Y-rectWnd.nY) / NPARTYSTATUS_HEIGHT;
            RequestAssist(m_arrID[idx], userinfo.Loc);
        }
    }
As you can see, the position of the mouse and the index of the window by which the assist is taken are calculated. Accordingly, you can always set an assist by the party leader (as an example), or by a group member with an index of 1-8 (also, for example, you can add a form for entering the index of a group member for which the assist will be made). -
52 minutes ago, lolpwnz89 said:
its possible makes form this assist party target on button?
Yes, of course.
-
9 hours ago, CriticalError said:
well what I can say, thanks for sharing your knowledge, I know in this times no all sharing value stuff, thanks and hope still making shares, thanks
Thanks for your kind words in all your comments!
-
On 1/5/2021 at 11:47 AM, Ehoq said:
@sacrifice yeah. i got same problem. grade mark works fine. but when i enchant weapon M.atk goes to - 21473712713. ( if i makes s80 grade (grade7)
If the question is still relevant to you, I have an answer. Sorry in advance for broken English, I use google translator. You need to introduce a local variable:
local int CrystalChap;In the ITEM_WEAPON block, we define it:
CrystalChap = Item.CrystalType;
            if (Item.CrystalType > 5)
            {
                CrystalChap = 5;
            }
In tooltips for physical and magical attacks, replace Item.CrystalType with CrystalChap, you get something like this:
//Physical Damage
            AddTooltipItemOption(94, String(GetPhysicalDamage(Item.WeaponType, Item.SlotBitType, CrystalChap, Item.Enchanted, Item.PhysicalDamage)), true, true, false);

            //Masical Damage
            AddTooltipItemOption(98, String(GetMagicalDamage(Item.WeaponType, Item.SlotBitType, CrystalChap, Item.Enchanted, Item.MagicalDamage)), true, true, false);
There will be no more problems with displaying enchants level.
-
1
-
-
41 minutes ago, Vision said:
You are helping a lot with such Guides!
Good job.
Thanks for all your comments, I hope they will be useful to someone. )
-
The information is more relevant for Interlude, but will work for the chronicles above as well. According to this example, you can bind any function (from calling the window for inserting a LAN, to your unique bypass, or some function like "target loss protection") to any hotkey or key combination.
First of all, go to xdat, Interface \ Shortcuts \ GamingStateShortcut and select a key / key combination, for example like this:
<ShortcutItem Key="IK_Space" SubKey1="IK_Alt">SelfTarget</ShortcutItem>
Now for target self you need to hold down the viola and click the space bar.
The key codes are sometimes obvious (IK_F1, IK_B, IK_Enter), and sometimes not very, just in case:SpoilerIK_None = 0
IK_LeftMouse = 1
IK_RightMouse = 2
IK_Cancel = 3
IK_MiddleMouse = 4
IK_Unknown05 = 5
IK_Unknown06 = 6
IK_Unknown07 = 7
IK_Backspace = 8
IK_Tab = 9
IK_Unknown0A = 10
IK_Unknown0B = 11
IK_Unknown0C = 12
IK_Enter = 13
IK_Unknown0E = 14
IK_Unknown0F = 15
IK_Shift = 16
IK_Ctrl = 17
IK_Alt = 18
IK_Pause = 19
IK_CapsLock = 20
IK_Unknown15 = 21
IK_Unknown16 = 22
IK_Unknown17 = 23
IK_Unknown18 = 24
IK_Unknown19 = 25
IK_Unknown1A = 26
IK_Escape = 27
IK_Unknown1C = 28
IK_Unknown1D = 29
IK_Unknown1E = 30
IK_Unknown1F = 31
IK_Space = 32
IK_PageUp = 33
IK_PageDown = 34
IK_End = 35
IK_Home = 36
IK_Left = 37
IK_Up = 38
IK_Right = 39
IK_Down = 40
IK_Select = 41
IK_Print = 42
IK_Execute = 43
IK_PrintScrn = 44
IK_Insert = 45
IK_Delete = 46
IK_Help = 47
IK_0 = 48
IK_1 = 49
IK_2 = 50
IK_3 = 51
IK_4 = 52
IK_5 = 53
IK_6 = 54
IK_7 = 55
IK_8 = 56
IK_9 = 57
IK_Unknown3A = 58
IK_Unknown3B = 59
IK_Unknown3C = 60
IK_Unknown3D = 61
IK_Unknown3E = 62
IK_Unknown3F = 63
IK_Unknown40 = 64
IK_A = 65
IK_B = 66
IK_C = 67
IK_D = 68
IK_E = 69
IK_F = 70
IK_G = 71
IK_H = 72
IK_I = 73
IK_J = 74
IK_K = 75
IK_L = 76
IK_M = 77
IK_N = 78
IK_O = 79
IK_P = 80
IK_Q = 81
IK_R = 82
IK_S = 83
IK_T = 84
IK_U = 85
IK_V = 86
IK_W = 87
IK_X = 88
IK_Y = 89
IK_Z = 90
IK_Unknown5B = 91
IK_Unknown5C = 92
IK_Unknown5D = 93
IK_Unknown5E = 94
IK_Unknown5F = 95
IK_NumPad0 = 96
IK_NumPad1 = 97
IK_NumPad2 = 98
IK_NumPad3 = 99
IK_NumPad4 = 100
IK_NumPad5 = 101
IK_NumPad6 = 102
IK_NumPad7 = 103
IK_NumPad8 = 104
IK_NumPad9 = 105
IK_GreyStar = 106
IK_GreyPlus = 107
IK_Separator = 108
IK_GreyMinus = 109
IK_NumPadPeriod = 110
IK_GreySlash = 111
IK_F1 = 112
IK_F2 = 113
IK_F3 = 114
IK_F4 = 115
IK_F5 = 116
IK_F6 = 117
IK_F7 = 118
IK_F8 = 119
IK_F9 = 120
IK_F10 = 121
IK_F11 = 122
IK_F12 = 123
IK_F13 = 124
IK_F14 = 125
IK_F15 = 126
IK_F16 = 127
IK_F17 = 128
IK_F18 = 129
IK_F19 = 130
IK_F20 = 131
IK_F21 = 132
IK_F22 = 133
IK_F23 = 134
IK_F24 = 135
IK_Unknown88 = 136
IK_Unknown89 = 137
IK_Unknown8A = 138
IK_Unknown8B = 139
IK_Unknown8C = 140
IK_Unknown8D = 141
IK_Unknown8E = 142
IK_Unknown8F = 143
IK_NumLock = 144
IK_ScrollLock = 145
IK_TRACKIR_PITCHUP = 146
IK_TRACKIR_PITCHDOWN = 147
IK_TRACKIR_YAWRIGHT = 148
IK_TRACKIR_YAWLEFT = 149
IK_TRACKIR_ROLLRIGHT = 150
IK_TRACKIR_ROLLLEFT = 151
IK_TRACKIR_MOVEUP = 152
IK_TRACKIR_MOVEDOWN = 153
IK_TRACKIR_MOVELEFT = 154
IK_TRACKIR_MOVERIGHT = 155
IK_TRACKIR_MOVEFORWARD = 156
IK_TRACKIR_MOVEBACKWARD = 157
IK_Unknown9E = 158
IK_Unknown9F = 159
IK_LShift = 160
IK_RShift = 161
IK_LControl = 162
IK_RControl = 163
IK_UnknownA4 = 164
IK_UnknownA5 = 165
IK_UnknownA6 = 166
IK_UnknownA7 = 167
IK_UnknownA8 = 168
IK_UnknownA9 = 169
IK_UnknownAA = 170
IK_UnknownAB = 171
IK_UnknownAC = 172
IK_UnknownAD = 173
IK_UnknownAE = 174
IK_UnknownAF = 175
IK_UnknownB0 = 176
IK_UnknownB1 = 177
IK_UnknownB2 = 178
IK_UnknownB3 = 179
IK_UnknownB4 = 180
IK_UnknownB5 = 181
IK_UnknownB6 = 182
IK_UnknownB7 = 183
IK_UnknownB8 = 184
IK_Unicode = 185
IK_Semicolon = 186
IK_Equals = 187
IK_Comma = 188
IK_Minus = 189
IK_Period = 190
IK_Slash = 191
IK_Tilde = 192
IK_Mouse4 = 193
IK_Mouse5 = 194
IK_Mouse6 = 195
IK_Mouse7 = 196
IK_Mouse8 = 197
IK_UnknownC6 = 198
IK_UnknownC7 = 199
IK_Joy1 = 200
IK_Joy2 = 201
IK_Joy3 = 202
IK_Joy4 = 203
IK_Joy5 = 204
IK_Joy6 = 205
IK_Joy7 = 206
IK_Joy8 = 207
IK_Joy9 = 208
IK_Joy10 = 209
IK_Joy11 = 210
IK_Joy12 = 211
IK_Joy13 = 212
IK_Joy14 = 213
IK_Joy15 = 214
IK_Joy16 = 215
IK_UnknownD8 = 216
IK_UnknownD9 = 217
IK_UnknownDA = 218
IK_LeftBracket = 219
IK_Backslash = 220
IK_RightBracket = 221
IK_SingleQuote = 222
IK_UnknownDF = 223
IK_UnknownE0 = 224
IK_UnknownE1 = 225
IK_UnknownE2 = 226
IK_UnknownE3 = 227
IK_MouseX = 228
IK_MouseY = 229
IK_MouseZ = 230
IK_MouseW = 231
IK_JoyU = 232
IK_JoyV = 233
IK_JoySlider1 = 234
IK_JoySlider2 = 235
IK_MouseWheelUp = 236
IK_MouseWheelDown = 237
IK_Unknown10E = 238
UK_Unknown10F = 239
IK_JoyX = 240
IK_JoyY = 241
IK_JoyZ = 242
IK_JoyR = 243
IK_UnknownF4 = 244
IK_UnknownF5 = 245
IK_Attn = 246
IK_CrSel = 247
IK_ExSel = 248
IK_ErEof = 249
IK_Play = 250
IK_Zoom = 251
IK_NoName = 252
Next, you need to describe the "SelfTarget" command itself. The easiest option is to go into the Interface \ Classes \ Shortcut scripts and find function HandleShortcutCommand (String a_Param) there and add:
 case "SelfTarget":
            RequestSelfTarget();
            break;
But, of course, you can insert a command into any class, but then you will have to create in it:function OnEvent( int a_EventID, String a_Param ) { switch( a_EventID ) { case EV_ShortcutCommand: HandleShortcutCommand( a_Param ); break; } }as well as the Handler itself :
function HandleShortcutCommand( String a_Param )
{
    local String Command;

    if( ParseString( a_Param, "Command", Command ) )
    {
        switch( Command )
        {
        case "SelfTarget":
            RequestSelfTarget();
            break;
        }
    }
}
That's all, with the help of these examples, you can call any function, in any class, to any key combination you need. Please note that if you call two different functions with one key, from different classes, but with the same name, they will be called simultaneously. It is convenient to use, for example, to simultaneously enable auto-buff and skill-spam panels from different classes.-
1
-
2
-
-
To teach the Interlude client to see LANs where they shouldn't be, you need to make a few changes in the Interface.U scripts.
Using the example of Jewelry and Hats: first, look in Interface \ Classes \ ToolTip:
 // 3. ACCESSARY
        case ITEM_ACCESSARY:
            bLargeWidth = true;

            //Slot Type
            if (Len(SlotString)>0)
                AddTooltipItemOption(0, SlotString, false, true, false);

            //Masical Defense
            AddTooltipItemOption(99, String(GetMagicalDefense(Item.CrystalType, Item.Enchanted, Item.MagicalDefense)), true, true, false);

            //Weight
            AddTooltipItemOption(52, String(Item.Weight), true, true, false);
        break;
Here we need to draw a LAN output, similar to ITEM_WEAPON, we get something like this:
 // 3. ACCESSARY
        case ITEM_ACCESSARY:
            bLargeWidth = true;

            if (Item.RefineryOp1 != 0 || Item.RefineryOp2 != 0)
            {
                AddTooltipItemBlank(12);

                AddTooltipItemOption(1490, "", true, false, false);
                SetTooltipItemColor(255, 255, 255, 0);

                if (Item.RefineryOp2 != 0)
                {
                    Quality = class'UIDATA_REFINERYOPTION'.static.GetQuality( Item.RefineryOp2 );
                    GetRefineryColor(Quality, ColorR, ColorG, ColorB);
                }

                if (Item.RefineryOp1 != 0)
                {
                    strDesc1 = "";
                    strDesc2 = "";
                    strDesc3 = "";
                    if (class'UIDATA_REFINERYOPTION'.static.GetOptionDescription( Item.RefineryOp1, strDesc1, strDesc2, strDesc3 ))
                    {
                        if (Len(strDesc1)>0)
                        {
                            AddTooltipItemOption(0, strDesc1, false, true, false);
                            SetTooltipItemColor(ColorR, ColorG, ColorB, 0);
                        }
                        if (Len(strDesc2)>0)
                            AddTooltipItemOption(0, strDesc2, false, true, false);
                        if (Len(strDesc3)>0)
                        {
                            AddTooltipItemOption(0, strDesc3, false, true, false);
                            SetTooltipItemColor(ColorR, ColorG, ColorB, 0);
                        }
                    }
                }

                if (Item.RefineryOp2 != 0)
                {
                    strDesc1 = "";
                    strDesc2 = "";
                    strDesc3 = "";
                    if (class'UIDATA_REFINERYOPTION'.static.GetOptionDescription( Item.RefineryOp2, strDesc1, strDesc2, strDesc3 ))
                    {
                        if (Len(strDesc1)>0)
                            AddTooltipItemOption(0, strDesc1, false, true, false);

                        if (Len(strDesc2)>0)
                            AddTooltipItemOption(0, strDesc2, false, true, false);
                            SetTooltipItemColor(ColorR, ColorG, ColorB, 0);
                        }
                        if (Len(strDesc3)>0)
                        {
                            AddTooltipItemOption(0, strDesc3, false, true, false);
                    }
                }

                AddTooltipItemOption(1491, "", true, false, false);
                SetTooltipItemColor(ColorR, ColorG, ColorB, 0);

                if (Len(Item.Description)>0)
                {
                    AddTooltipItemBlank(12);
            }
            if (Len(SlotString)>0)
                AddTooltipItemOption(0, SlotString, false, true, false);

            AddTooltipItemOption(99, String(GetMagicalDefense(Item.CrystalType, Item.Enchanted, Item.MagicalDefense)), true, true, false);

            AddTooltipItemOption(52, String(Item.Weight), true, true, false);
        break;
After these changes, the client will begin to see IDs in jewelry and accessories, the same can be done for ITEM_ARMOR, so that IDs are displayed in armor.
From the server side, first of all, you need to allow augmentation of not only weapons. Using the example of my assembly, this is done here:
src \ net \ sf \ l2j \ gameserver \ model \ L2ItemInstance
We are looking for public boolean canBeAugmented () and replace it with the condition we need, using the example of the possibility of inserting drugs into jewelry and accessories, for example, like this:
 if (getItem().getItemGrade() < L2Item.CRYSTAL_C || (getItem().getType2() != L2Item.TYPE2_WEAPON && getItem().getType2() != L2Item.TYPE2_ACCESSORY)) {
            return false;
      }
Likewise with armor, you can enable / disable insertion into certain parts of the armor, for example, only into the breastplate.
Of course, then you will need to configure which LANs and where they are inserted, under what conditions for inserting and removing LANs, etc., but this is a completely different story, the goal was to indicate where this is done in the client, because on the server side everything depends on the assembly.-
2
-
2
-
-
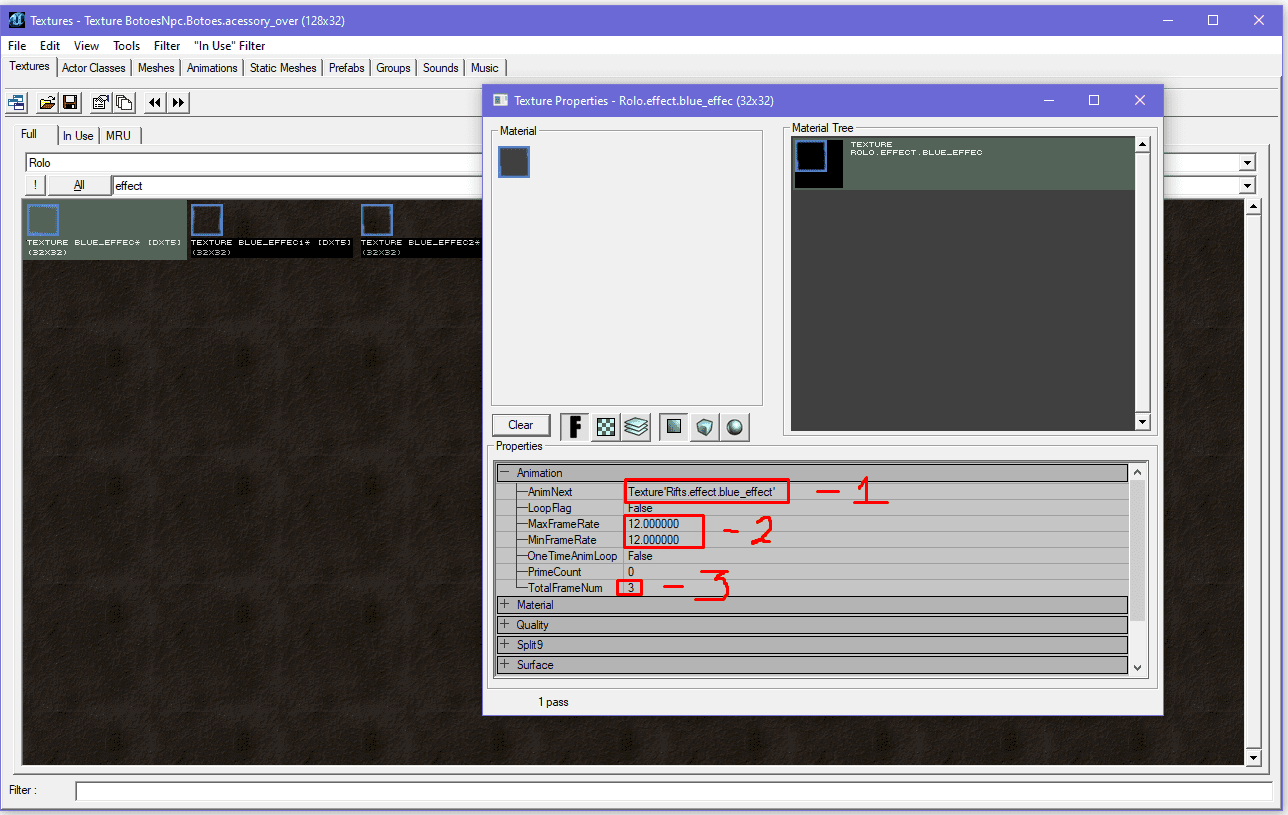
First of all, we need to get the "frames" of our animation, because by itself it is a series of quickly (or not so) scrolling textures. When the textures are ready, load them into UE2 (it is assumed that you can do this, since you set out to make your own animated logo).
Important notes:
Name textures with numbering, this will greatly simplify your life when assembling textures into animation.
Note that the UE will supply a file called texture_11 rather than texture_2.
In other words, it sorts by matching characters, and does not read your numbering.
The 1 comes before the 2, so even if there are at least 100 million, the texture will be in front of the 2 texture.Open our first texture with the right button, click Properties, open the Animation block in the pop-up window, and look:
1 is the next texture in our animation.
2 - number of frames per second (animation scrolling speed).
3 - the total number of textures in the animation.
Important notes:
Strictly follow the order of adding animations.
Your goal is in the line AnimNext (now it will be unexpected) to specify the next texture in the animation.
Thus, the Properties of the first AnimNext texture contains the second texture;
The Properties of the second AnimNext texture contains the third texture;
The Properties of the third AnimNext texture contains the first texture;There is no need to specify the number and speed of texture playback in each texture, this is done only in the first texture!
All subsequent ones should contain only a link to the next texture.There is a small nuance of adding the next texture, copying the name of the next texture into the line is an obvious, but not correct move. This is done as follows: Select the texture, open its Properties, now move the pop-up window, click on the next texture, and in the Properties of the first texture, in the AnimNext line, click use. This is how we add all the textures to the animation chain.
When we loop the last texture on the first one, and go to the Properties of the first texture, we will see the animation itself, if it is not there, something jerks / disappears - most likely, you missed some texture, or poorly composed a number of textures, or not followed order, or you have invented a new way to screw everything up with which I congratulate you and sympathize with you at the same time. And that's all, then save it as a regular texture, the name of the very first texture is inserted into HTML, where the number and frequency of frame refresh are set.
-
1
-
1
-
1
-


Another version of Giran's centre. (Interlude)
in Client Development Discussion
Posted
Still think it's the geodata, I've changed mine and there's no problem with flying NPS. )

It's not the same version, the standard Giran textures are used here and in your screenshot they've been changed. Also in this version my co-author wanted to place a tent in the square. Also, in my version there are trees on the square and in yours there are none.