

[Guide]Complete guide for NO-IP.Server/Web!


-
Posts
-
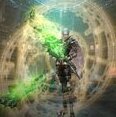
 Fresh off my private server for inspiration.
 -
 Custom High Five server L2insolence will open 2026-06-17 21:00 GMT+2 ! ! ! Web: http://www.l2insolence.eu/ Discord: https://discord.gg/duMjnj3y9A We have custom: 10 diferent looking custom armor sets. 8 weapon sets, 2 weapons sets are upgradable. 6 jewel sets. ----------------------------------- All custom tatto, masks, cloaks, agathions, belts, bracelest, talismans and more. Everi single item have own custom stats like: +p.atk% , +m.atk% , +p/m.def% and mutch more. All items in game have own stats. With custom looks. Glowing etc. ----------------------------------- Rates XP, SP: 25x Spoil and Drop: 10x Server Hard Farm ----------------------------------- Enchantment Safe enchant: +20099 Max enchant: +20099 All scrolls: 100% ----------------------------------- You can use scrolls or item enchant NPC to make +++ abd life beter. NPC Buffer There's an NPC buffer in all of our main towns. We have custom self buffs learned with npc with custom stats. Global Gatekeeper. GM Shop with normal items and custom ones, Event NPC, item upgrader NPC. Raid Bosses, every zone have its own boss and drops for rare mats, respawn every 10 seconds.. Olympiad The olympiad is ongoing every two weeks.
 -
-

By IronLock Shield · Posted
I agree that kernel-level protection offers much deeper visibility and control, especially when it comes to advanced bots and bypass techniques. That said, I'm not trying to claim that a usermode solution is impossible to bypass. My goal is simply to increase the cost and complexity of bypassing the protection while keeping deployment simple, stable, and compatible for server owners. A lot of Interlude server operators don't want to install kernel drivers or deal with the risks and maintenance that come with them. That's why I'm currently focusing on a layered approach: secure launcher architecture, HWID licensing, session validation, anti-debugging, injection detection, integrity checks, replay protection, and heartbeat monitoring. I'm not ruling out kernel support in the future. Right now, my priority is gathering real-world feedback, improving the product, and learning how people attempt to bypass different protection layers. I appreciate the feedback and the discussion. -

By Banshee Garnet · Posted
not true, you can change any bot program name so the ones that are injecting aint a problem any more, you can aswell bypass everything in a dll so his way of thinking isnt bad at all
-
-
Topics
-


Recommended Posts
Create an account or sign in to comment
You need to be a member in order to leave a comment
Create an account
Sign up for a new account in our community. It's easy!
Register a new accountSign in
Already have an account? Sign in here.
Sign In Now